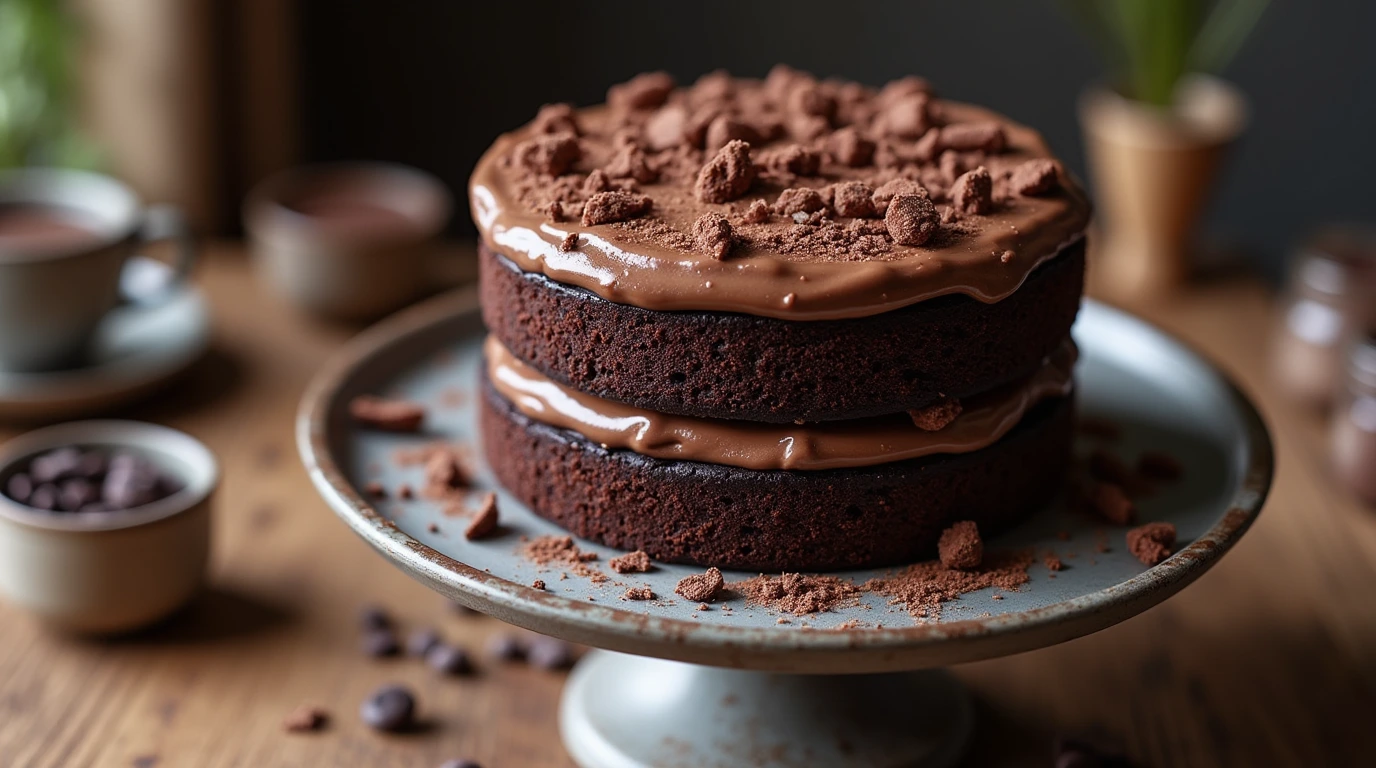
If you’re a true chocolate lover, get ready to meet your new favorite dessert—Blackout Cake. This rich, ultra-decadent cake is layered with moist chocolate cake, creamy chocolate pudding, and topped with a generous chocolate crumb coating. Originally known as the Brooklyn Blackout Cake, this dessert is famous for its deep chocolate flavor and irresistible texture. Whether you’re baking for a special occasion or simply treating yourself at home, this cake is guaranteed to impress. In this post, I’ll show you exactly how to make the perfect blackout cake step by step—no fancy skills required!
Table of Contents
What is a Blackout Cake?
A Brief History of Brooklyn Blackout Cake
The Brooklyn Blackout Cake isn’t just a delicious dessert—it actually has a fun and interesting history behind it. This iconic chocolate cake was first created by Ebinger’s Bakery, a beloved bakery in Brooklyn, New York, that opened its doors back in 1898. Over the years, Ebinger’s became famous for many sweet treats, but none quite as popular as their Blackout Cake.
The name “Blackout Cake” came about during World War II. At the time, the U.S. government enforced citywide blackout drills—a safety measure to protect the city from enemy air raids. Ebinger’s cleverly named this rich, dark chocolate cake in reference to those blackouts, and the name stuck.
This cake quickly became a local favorite across Brooklyn, known for its deep, dark chocolate layers, creamy chocolate pudding filling, and chocolate cake crumbs sprinkled on top. It was everything a chocolate lover could dream of—rich, moist, and indulgent. Even after Ebinger’s closed in the 1970s, the cake lived on, and today, many home bakers and bakeries still recreate this classic dessert as a tribute to its chocolatey legacy.
So when you make a blackout cake at home, you’re not just baking a cake—you’re making a little piece of New York dessert history!
What Makes a Blackout Cake Unique?
You might be wondering—what makes a blackout cake different from any other chocolate cake? The answer is simple: it’s all about the layers, the filling, and that rich, over-the-top chocolate flavor.
First, the cake layers themselves are extra moist and intensely chocolatey. Unlike some chocolate cakes that can be light or dry, blackout cake has a deeper, fudgier texture. That rich flavor usually comes from a generous amount of cocoa powder and sometimes even melted chocolate or brewed coffee in the batter to enhance the chocolate taste.
But what really sets blackout cake apart is the creamy chocolate pudding filling. Yes, pudding! Instead of just frosting between the layers, this cake has a smooth, velvety chocolate pudding spread in the middle and sometimes even on top. It adds a soft, creamy bite that perfectly complements the dense cake. It’s a little unexpected—but oh so delicious.
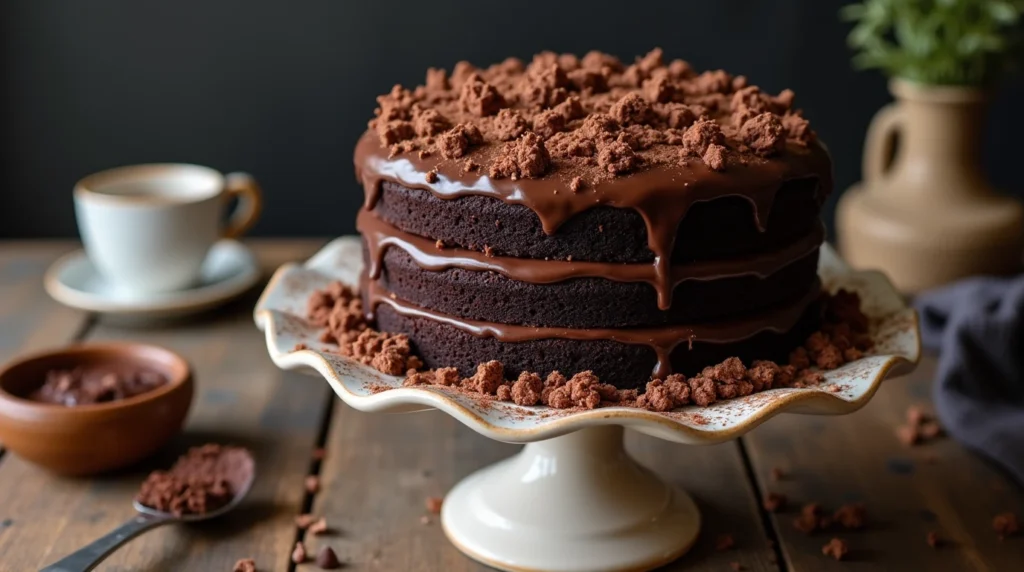
And let’s not forget the finishing touch: the chocolate cake crumb topping. After assembling the cake, you crumble some extra cake (or trimmings from the layers) and gently press those crumbs all over the outside of the cake. It adds a unique texture and gives the cake its signature “blackout” look—deep, dark, and completely covered in chocolate from top to bottom.
So, to sum it up: blackout cake is unique because it’s not just a chocolate cake—it’s a chocolate lover’s dream, layered with pudding, topped with crumbs, and bursting with bold, rich flavor in every bite.
Ingredients and Tools You’ll Need

Key Ingredients for the Perfect Blackout Cake
A great blackout cake starts with the right ingredients—and luckily, most of them are pantry staples you might already have at home. Each ingredient plays an important role in creating the cake’s rich flavor, moist texture, and signature chocolate pudding filling. Here’s what you’ll need to make your blackout cake truly perfect:
For the Chocolate Cake Layers:
- All-Purpose Flour – This is the base of the cake that gives it structure and helps everything hold together.
- Unsweetened Cocoa Powder – The star of the show! Cocoa powder gives the cake its deep chocolate flavor and beautiful dark color. Go for a good-quality cocoa powder for the best results.
- Baking Soda – Helps the cake rise and gives it a light, fluffy texture while still being rich and moist.
- Granulated Sugar – Adds sweetness and helps keep the cake soft and tender.
- Buttermilk – This secret ingredient adds a slight tang and keeps the cake incredibly moist. If you don’t have buttermilk, you can make a quick substitute by mixing milk with a splash of vinegar or lemon juice.
- Butter or Oil – Butter adds rich flavor, while oil makes the cake extra moist. Some recipes use a mix of both!
- Eggs – These help bind the ingredients together and give the cake structure and stability.
- Vanilla Extract – Just a little bit enhances the overall flavor and balances the richness of the chocolate.
For the Chocolate Pudding Filling:
- Milk – The base for the pudding that gives it a smooth, creamy texture.
- Cornstarch – Used to thicken the pudding naturally without eggs.
- Cocoa Powder & Sugar – For flavor and sweetness, just like in the cake layers.
- Semi-Sweet or Bittersweet Chocolate – Melted chocolate is often added to the pudding to make it extra rich and indulgent.
- Butter – A small amount stirred in at the end adds a silky finish.
Optional Add-ins:
- Espresso Powder – A little bit of espresso powder can intensify the chocolate flavor without making the cake taste like coffee.
- Chocolate Chips or Chunks – Mix them into the batter or sprinkle them on top for extra chocolaty goodness.
Each of these ingredients helps create that perfect combination of rich, moist cake and creamy pudding that makes blackout cake so irresistible. Once you have everything ready, you’re one step closer to making this chocolate masterpiece right in your own kitchen!
Must-Have Baking Tools
Before you dive into making your delicious blackout cake, it’s a good idea to have the right tools on hand. You don’t need anything too fancy—just a few basic kitchen essentials that will make baking easier and help your cake turn out beautifully. Here’s a list of the must-have baking tools you’ll need for this recipe:
1. Cake Pans (Usually Two or Three 8-Inch or 9-Inch Round Pans)
These are essential for baking the cake layers. Make sure to grease and line them properly so your cakes come out clean and in one piece. Using multiple pans also helps ensure even baking and saves time compared to baking one thick cake and slicing it later.
2. Mixing Bowls (At Least One Large and One Medium)
You’ll need bowls to mix your dry ingredients, wet ingredients, and pudding filling. A large mixing bowl is ideal for the cake batter, while a medium one works great for preparing the pudding or combining other components.
3. Electric Mixer or Hand Whisk
An electric hand mixer or a stand mixer makes creaming butter, sugar, and mixing the batter much faster and easier. But if you don’t have one, a good old-fashioned whisk and a little arm power will still do the trick!
4. Saucepan (For the Pudding Filling)
To make the smooth, rich chocolate pudding, you’ll need a small or medium saucepan. This is where you’ll heat and thicken the pudding mixture on the stovetop.
5. Rubber Spatula or Wooden Spoon
A spatula is super helpful for scraping down the sides of your bowl, folding in ingredients, and spreading pudding or frosting smoothly onto the cake layers.
6. Wire Cooling Rack
After baking, it’s important to let your cake layers cool completely before assembling the cake. A cooling rack allows air to circulate around the cake and helps prevent sogginess.
7. Cake Plate or Turntable (Optional but Handy)
If you want to assemble and frost your cake like a pro, a cake stand or rotating turntable makes the job a lot easier. It’s especially helpful for spreading frosting evenly and pressing on those signature cake crumbs.
8. Serrated Knife or Cake Leveler (Optional)
If your cake layers puff up a bit unevenly, a serrated knife can help you trim the tops for a flat, even surface. You can also use those trimmed pieces for the classic chocolate crumb topping!
Having these simple tools ready makes the whole process smoother, from mixing to baking to decorating. And the best part? Once you have these essentials, you’ll be set for lots of future baking adventures!
Optional Add-ins and Variations
One of the best things about making a blackout cake at home is that you can get a little creative and make it your own! While the classic version is already a chocolate lover’s dream, there are a few fun add-ins and flavor twists you can try to give your cake a personal touch. Whether you want to enhance the flavor, change the texture, or make it even more indulgent, here are some simple ideas:
1. Add Espresso Powder for a Richer Chocolate Flavor
A small spoonful of espresso powder or instant coffee granules mixed into the cake batter can really take your chocolate flavor to the next level. Don’t worry—it won’t taste like coffee! It just enhances the richness of the cocoa and gives the cake a deeper, more intense chocolate taste.
2. Mix in Chocolate Chips or Chunks
For a little extra chocolate surprise in every bite, try folding chocolate chips, chocolate chunks, or even mini chocolate pieces into the batter before baking. They melt into little pockets of gooey goodness and add texture to the cake.
3. Try a Whipped Cream Topping
If you want something a little lighter than a full chocolate frosting or pudding on top, you can use a layer of sweetened whipped cream for a fluffy finish. You can even swirl in a bit of cocoa powder or chocolate syrup to keep the chocolate theme going.
4. Add a Hint of Fruit
Chocolate pairs beautifully with fruits like raspberries, cherries, or strawberries. You can layer a few fresh berries between the cake and pudding, or serve slices with a fruit compote or sauce on the side for a sweet-tart contrast.
5. Make It a Mini or Cupcake Version
Want to try something fun and bite-sized? You can turn your blackout cake into individual cupcakes or mini cakes. Simply bake the batter in cupcake tins and fill the centers with pudding before topping with cake crumbs. Perfect for parties or portion control!
6. Add a Crunchy Layer
For a fun texture twist, try adding a thin layer of crushed chocolate cookies, nuts, or even toffee bits between the layers along with the pudding. It adds a little crunch and a whole lot of flavor.
7. Make It Dairy-Free or Vegan
If you need a dairy-free or vegan version, you can easily swap out ingredients like butter, milk, and eggs with plant-based alternatives. Use non-dairy milk, vegan butter, and egg substitutes like flax eggs or applesauce. There are also great plant-based pudding recipes you can try!
Step-by-Step: How to Make the Perfect Blackout Cake
Baking the Moist Chocolate Cake Layers
This is where the magic begins! Baking the cake layers is the foundation of your blackout cake, and it’s easier than you might think. With the right ingredients and a few simple steps, you’ll end up with rich, moist, deeply chocolatey layers that are perfect for stacking and filling. Let’s walk through the process step by step.
1. Preheat Your Oven and Prepare Your Pans
Start by preheating your oven to 350°F (175°C). While it’s warming up, grease your cake pans (usually two or three 8- or 9-inch round pans) and line the bottoms with parchment paper. This helps your cakes come out of the pans easily and keeps them from sticking or breaking apart.
2. Mix the Dry Ingredients
In a large mixing bowl, whisk together your flour, cocoa powder, baking soda, and a pinch of salt. This ensures everything is evenly combined and your cake will rise properly. Good-quality unsweetened cocoa powder makes a big difference here—it’s the key to that deep, chocolate flavor.
3. Cream the Butter and Sugar
In another bowl (or in your stand mixer), beat together butter and sugar until the mixture is light and fluffy. This step helps create a soft texture and even crumb. If you’re using oil instead of butter, you can simply mix the oil and sugar together until smooth.
4. Add Eggs and Vanilla
Crack in your eggs one at a time, mixing well after each addition. Then stir in your vanilla extract. These ingredients help bind the batter and add richness to the cake.
5. Alternate Wet and Dry Ingredients
Now it’s time to bring everything together. Gradually add the dry ingredients and buttermilk in alternating portions—start and end with the dry mix. For example, add ⅓ of the flour mix, then half of the buttermilk, then more flour, and so on. This helps keep the batter smooth and prevents lumps.
Tip: If you want to boost the chocolate flavor even more, try mixing a little hot coffee or espresso into the batter at this stage. It enhances the chocolate without making the cake taste like coffee.
6. Pour and Smooth the Batter
Divide the batter evenly between your prepared pans and gently smooth the tops with a spatula. Don’t worry if they’re not perfectly flat—they’ll level out a bit during baking.
7. Bake and Check for Doneness
Place the pans in the oven and bake for 25–30 minutes, depending on your oven and pan size. You’ll know they’re ready when a toothpick inserted in the center comes out clean or with just a few moist crumbs. Be careful not to overbake—moistness is key for blackout cake!
8. Cool Completely Before Assembling
Let the cakes cool in their pans for about 10–15 minutes, then carefully transfer them to a wire rack to cool completely. If you try to stack or frost the cake while it’s still warm, it can fall apart or melt the pudding.
Making the Chocolate Pudding Filling
The chocolate pudding filling is what truly makes a blackout cake stand out. It’s creamy, rich, and oh-so-decadent, perfectly complementing the moist chocolate cake layers. Plus, it’s easier to make than you might think! Here’s how to create this silky, smooth filling that will have everyone coming back for seconds.
1. Heat the Milk and Sugar
Start by placing a medium-sized saucepan on the stovetop over medium heat. Add your milk (either whole milk or a dairy-free alternative) and granulated sugar. Stir the mixture gently to help dissolve the sugar as the milk heats up. You want to warm it up without letting it come to a boil—just heat it until it’s steaming and the sugar is fully dissolved.
2. Mix the Dry Ingredients
While the milk and sugar are heating, grab a separate bowl and whisk together the cocoa powder and cornstarch. This helps prevent clumping when you add them to the milk later. The cornstarch is the secret ingredient that helps thicken the pudding, giving it that velvety texture.
3. Combine the Cocoa and Cornstarch with the Milk
Once the milk and sugar are warm, slowly whisk in the dry ingredients. Keep stirring as you do this to ensure everything is combined smoothly. The mixture should start to thicken a bit as the cornstarch activates.
4. Add the Chocolate
At this point, you’ll want to add the melted chocolate. You can use semi-sweet chocolate, bittersweet chocolate, or even milk chocolate, depending on how rich you want the filling to be. Stir the melted chocolate into the pudding mixture until it’s fully incorporated, creating a beautiful glossy finish.
5. Cook Until Thickened
Continue cooking the mixture over medium heat, stirring constantly. You’ll notice the pudding starting to thicken after a few minutes—this is when you want to keep a close eye on it to make sure it doesn’t stick to the bottom of the pan. Once it reaches a thick, creamy consistency (like the texture of a custard), remove the pan from the heat.
6. Stir in Butter and Vanilla
For extra richness and silkiness, stir in butter until it melts completely. Then, add vanilla extract to round out the flavors and give your pudding that warm, comforting aroma. The pudding should now be smooth and thick—perfect for filling the layers of your blackout cake.
7. Let It Cool
Before using the pudding, let it cool for a bit at room temperature. You can even cover the top with a piece of plastic wrap to prevent a skin from forming. However, make sure the pudding has cooled down enough before spreading it between the cake layers, so it doesn’t melt the cake or create a mess.
Assembling and Frosting the Cake
Now that you’ve baked your moist chocolate cake layers and made that indulgent chocolate pudding filling, it’s time to bring everything together into one delicious masterpiece. Assembling and frosting a blackout cake is the fun part—watching the layers come together and seeing your creation take shape! Here’s how to assemble and frost your cake like a pro.
1. Level the Cake Layers (If Needed)
Before you start stacking your cake layers, make sure they’re nice and level. Sometimes, cakes can rise a little unevenly in the oven, so it’s a good idea to trim the tops of your cake layers with a serrated knife or cake leveler. This ensures the layers stack evenly and won’t tilt when you frost the cake.
Tip: Save the cake scraps for decoration or snacking later!
2. Place the First Cake Layer on Your Cake Plate or Stand
Carefully move the first layer of cake onto your cake plate or turntable. If you’re using a rotating turntable, it makes frosting and decorating the cake much easier. If not, a sturdy cake plate or serving dish works just fine.
3. Spread the Chocolate Pudding Filling
Now comes the fun part—spreading the creamy chocolate pudding filling! Use a rubber spatula or an offset spatula to spread a generous amount of pudding over the first cake layer. Make sure to spread it evenly all the way to the edges. Be gentle to avoid tearing the cake, but don’t worry if it gets a little messy—this is where the magic happens.
4. Add the Second Cake Layer
Once the first layer is covered in pudding, carefully place the second cake layer on top. Press down gently to ensure it sticks, but not so much that the pudding oozes out. If you have three layers, repeat the same process with the third layer.
5. Frost the Whole Cake with Chocolate Frosting
Now it’s time to frost the outside of your cake. If you want a classic blackout cake look, you’ll need chocolate frosting (either homemade or store-bought). Start by applying a thin layer of frosting around the sides and top of the cake to create what’s called a “crumb coat.” This helps seal in the crumbs and gives you a smooth surface to work with.
Once the crumb coat is applied, refrigerate the cake for 15–20 minutes to set it before applying the final coat of frosting. This helps the frosting go on smoothly without pulling crumbs into it.
After chilling, apply a thicker layer of frosting over the top and sides of the cake. Use your spatula to smooth it out as evenly as possible, creating a clean and glossy finish.
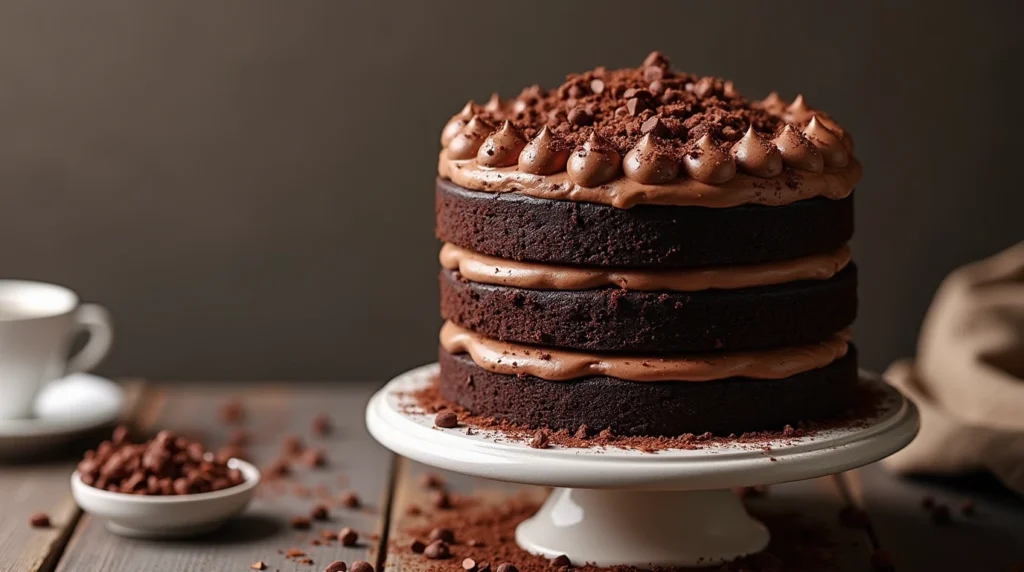
6. Decorate with Cake Crumbs or Chocolate Shavings
To make your blackout cake look extra special, you can press some of the chocolate cake crumbs from the trimmed tops into the sides of the cake, covering it with a crumbly chocolate coating. Alternatively, you can decorate with chocolate shavings or chocolate curls for a more elegant look.
If you have any extra pudding, drizzle it over the top or serve it on the side as a decadent sauce.
7. Chill and Serve
Once your cake is fully frosted and decorated, let it chill in the fridge for about 30 minutes to an hour. This helps the frosting firm up and makes it easier to slice. When you’re ready to serve, slice the cake carefully with a sharp knife to get clean, even slices.
Conclusion
And there you have it—a homemade blackout cake that’s rich, indulgent, and absolutely irresistible! Whether you’re celebrating a special occasion, treating yourself to a sweet treat, or impressing your guests with a show-stopping dessert, this cake is sure to be a hit. The layers of moist chocolate cake, silky chocolate pudding filling, and smooth chocolate frosting come together to create a dessert that’s every chocolate lover’s dream.
Remember, while the classic recipe is hard to beat, you can always get creative with add-ins, variations, or toppings to make the cake your own. Add a little espresso for extra depth, mix in some chocolate chips for texture, or top it with whipped cream for a lighter finish—the possibilities are endless!
So next time you’re in the mood for a decadent dessert, give this blackout cake recipe a try. It’s easier than you might think and will certainly satisfy your sweet tooth. Enjoy every bite, and don’t forget to share this delicious treat with friends and family!