Who doesn’t love a delicious, perfectly cooked chicken breast for dinner? It’s versatile, healthy, and can be whipped up in no time, making it a go-to choice for busy weeknights or special family meals. Whether you’re grilling, baking, or pan-searing, there are countless ways to transform this lean protein into a flavorful dish that everyone will enjoy. In this post, we’ll explore some amazing chicken breast recipes for dinner, along with tips to ensure your chicken turns out juicy and tender every single time. Let’s get cooking!
Table of Contents
Essential Tips for Cooking Perfect Chicken Breast
Choose the Right Cut of Chicken Breast
When it comes to cooking chicken breast for dinner, starting with the right cut is key to achieving a delicious and tender result. Not all chicken breasts are created equal, so let’s break it down to help you make the best choice for your recipe.
Boneless vs. Bone-In
One of the first decisions you’ll face at the grocery store is whether to buy boneless or bone-in chicken breasts. Boneless chicken breasts are convenient and cook faster, making them perfect for quick weeknight meals. On the other hand, bone-in chicken breasts tend to stay juicier during cooking because the bone helps retain moisture. If you have a bit more time, go for bone-in if you want extra flavor and tenderness.
Skin-On or Skinless?
Another important choice is whether to go for skin-on or skinless chicken breasts. Skin-on chicken can add richness and crispiness when cooked properly, especially when pan-seared or roasted. The skin also acts as a barrier, keeping the meat moist while it cooks. If you’re looking for a healthier option, skinless chicken is a great choice, but just be mindful that it can dry out more easily, so you’ll need to pay closer attention to cooking times.
Thickness Matters
The thickness of your chicken breast can make a big difference in how evenly it cooks. Some chicken breasts come in uneven shapes, which can lead to parts being overcooked or underdone. To avoid this, consider butterflying your chicken breast (cutting it horizontally to create two thinner pieces) or simply pounding it with a meat mallet until it’s an even thickness. This small step ensures your chicken cooks uniformly and stays juicy.
Master the Cooking Techniques
Once you’ve chosen the perfect cut of chicken breast, it’s time to decide how you’re going to cook it. Different cooking techniques can bring out unique flavors and textures, so let’s explore some of the most popular methods for preparing chicken breast for dinner. Whether you’re a seasoned chef or just starting out, these techniques are simple enough for anyone to master.
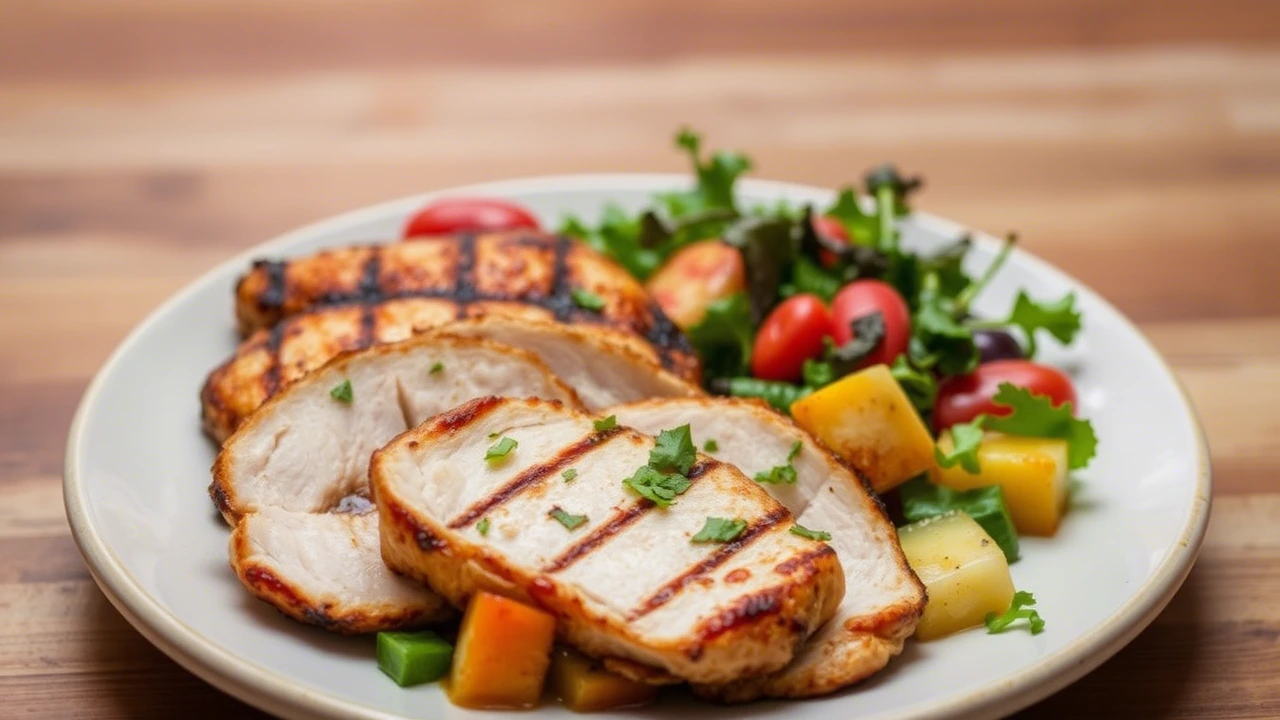
1. Grilling: Perfect for Summer Nights
Grilling is one of the best ways to give your chicken breast that delicious smoky flavor and those attractive grill marks everyone loves. To grill chicken perfectly:
- Preheat your grill to medium-high heat.
- Brush the chicken with a little oil to prevent sticking.
- Season generously with salt, pepper, and your favorite herbs like rosemary or thyme.
- Cook the chicken for about 6-8 minutes on each side, or until the internal temperature reaches 165°F (74°C).
Grilled chicken pairs beautifully with fresh salads, corn on the cob, or roasted veggies for a complete meal.
2. Baking: The Hands-Off Method
Baking chicken breast in the oven is ideal when you want minimal effort but maximum flavor. It’s also great for cooking multiple pieces at once. Here’s how:
- Preheat your oven to 375°F (190°C).
- Place the chicken breasts in a baking dish and coat them with olive oil, garlic, lemon juice, or any marinade you prefer.
- Bake for 20-25 minutes, or until the chicken is cooked through and no longer pink inside.
Baked chicken is super versatile and can be served with mashed potatoes, rice, or quinoa for a comforting dinner.
3. Pan-Searing: Quick and Flavorful
For those busy weeknights, pan-searing is a fast and easy way to get a juicy chicken breast with a golden-brown crust. Follow these steps:
- Heat a skillet over medium-high heat and add a tablespoon of oil.
- Once hot, place the chicken breast in the pan and let it sear undisturbed for about 5 minutes.
- Flip the chicken and reduce the heat to medium, cooking for another 5-7 minutes until done.
Pan-seared chicken pairs wonderfully with pasta dishes, sauces, or a simple side of steamed vegetables.
Delicious Chicken Breast Recipes for Dinner
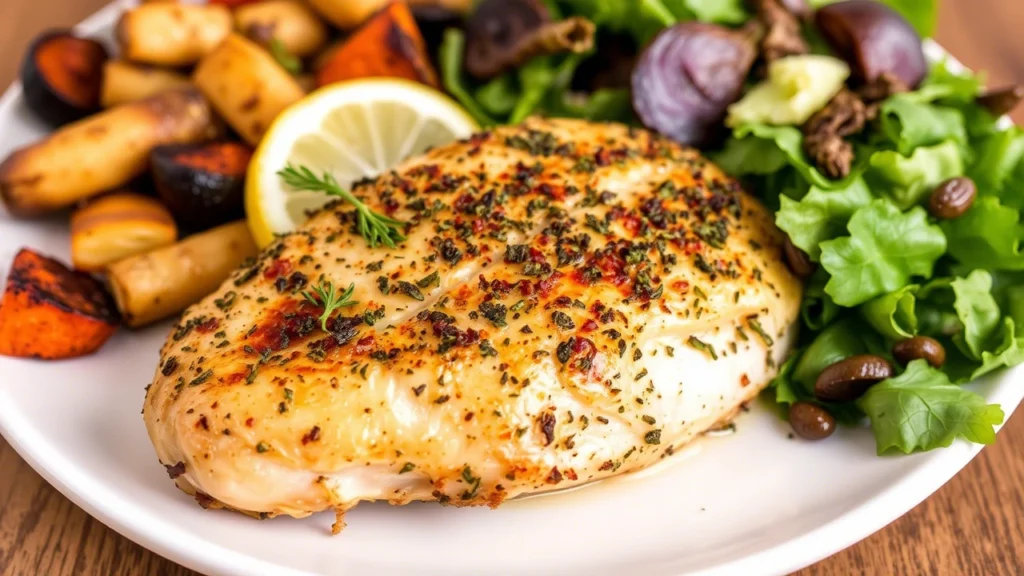
Herb-Crusted Chicken Breast
If you’re looking to take your chicken breast dinner to the next level, an herb-crusted chicken breast is a fantastic option. This recipe not only adds incredible flavor but also gives your chicken a delightful crunch that pairs beautifully with its tender interior. Best of all, it’s simple to make and can be customized to suit your taste preferences. Let’s break it down step by step.
Why You’ll Love Herb-Crusted Chicken Breast
The beauty of this dish lies in its simplicity and versatility. The combination of fresh herbs, garlic, and Parmesan cheese creates a savory crust that complements the mild flavor of chicken perfectly. Plus, the crunchy texture adds an extra layer of satisfaction to every bite. Whether you’re serving it for a casual family dinner or impressing guests at a special occasion, this recipe is sure to please.
Ingredients You’ll Need
Here’s what you’ll need to create this delicious herb-crusted chicken breast:
- 4 boneless, skinless chicken breasts (pounded to even thickness)
- 1 cup breadcrumbs (plain or panko)
- 2 tablespoons grated Parmesan cheese
- 2 tablespoons chopped fresh herbs (such as thyme, rosemary, or parsley)
- 2 cloves garlic, minced
- 2 tablespoons olive oil
- Salt and pepper to taste
Step-by-Step Instructions
- Prepare Your Chicken Breasts
Start by pounding the chicken breasts to an even thickness using a meat mallet. This ensures they cook evenly and prevents some parts from drying out while others remain undercooked. Season both sides generously with salt and pepper. - Make the Herb Crust Mixture
In a small bowl, combine the breadcrumbs, grated Parmesan cheese, chopped herbs, minced garlic, and a pinch of salt and pepper. Mix everything together until well combined. This mixture will form the crispy crust on your chicken. - Coat the Chicken
Heat the olive oil in a large skillet over medium heat. Once hot, dip each chicken breast into the breadcrumb mixture, pressing gently to ensure it adheres well. Place the coated chicken breasts in the skillet, leaving enough space between them for even cooking. - Cook Until Golden and Juicy
Cook the chicken breasts for about 5-6 minutes on each side, or until they are golden brown and cooked through. Use a meat thermometer to check that the internal temperature has reached 165°F (74°C). If you prefer, you can finish cooking the chicken in the oven at 375°F (190°C) for 5-10 minutes to ensure it’s perfectly done without over-browning the crust.
Serving Suggestions
Herb-crusted chicken breast pairs beautifully with a variety of sides. Here are a few ideas:
- A fresh garden salad dressed with lemon vinaigrette
- Roasted potatoes tossed with rosemary and garlic
- Steamed asparagus or green beans for a lighter option
- Creamy mashed potatoes for a comforting touch
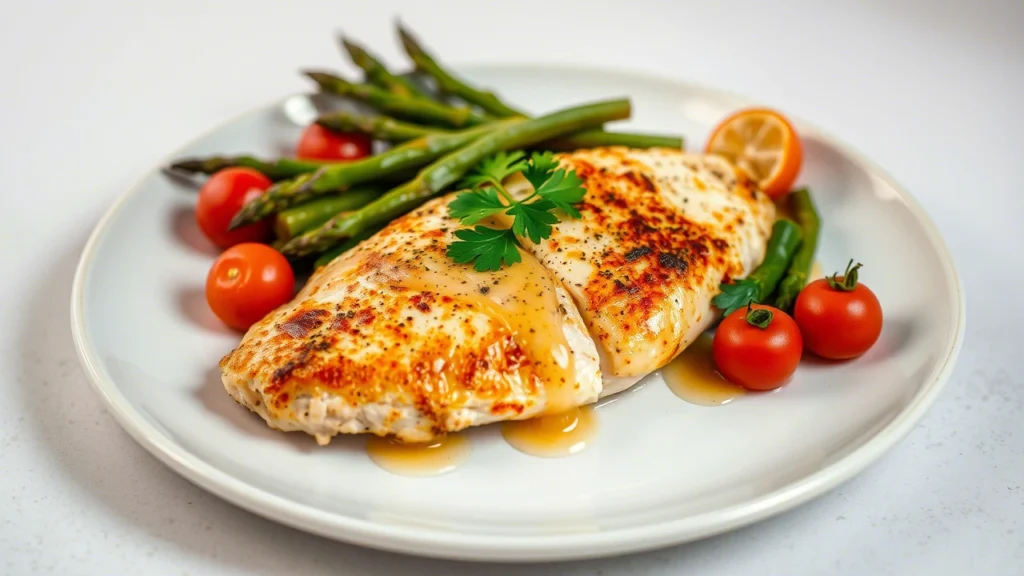
Lemon Garlic Chicken Breast
If you’re a fan of bright, zesty flavors that are both simple and satisfying, Lemon Garlic Chicken Breast is the perfect recipe for your dinner table. This dish is not only easy to make but also packed with fresh, tangy goodness that will leave your taste buds dancing. Plus, it’s ready in under 30 minutes, making it ideal for busy weeknights or when you want something quick yet impressive.
Why Lemon Garlic Chicken Breast Stands Out
The combination of lemon and garlic is a classic pairing for a reason—it’s light, refreshing, and adds just the right amount of tang and aroma to any dish. The acidity from the lemon helps tenderize the chicken while infusing it with flavor, and the garlic gives it a savory depth that complements the mildness of the chicken breast perfectly. Best of all, this recipe requires minimal ingredients and effort, so even beginner cooks can achieve restaurant-quality results.
Ingredients You’ll Need
Here’s what you’ll need to whip up this delicious Lemon Garlic Chicken Breast:
- 4 boneless, skinless chicken breasts
- Juice of 2 lemons (about 1/4 cup)
- 3 cloves garlic, minced
- 2 tablespoons olive oil
- 1 teaspoon dried oregano (or 1 tablespoon fresh, chopped)
- Salt and pepper to taste
- Optional: Fresh parsley for garnish
Step-by-Step Instructions
- Prepare the Marinade
In a small bowl, whisk together the lemon juice, minced garlic, olive oil, dried oregano, salt, and pepper. This marinade is what gives the chicken its vibrant flavor, so don’t skip this step! If you have time, let the chicken marinate in the fridge for at least 15-30 minutes to allow the flavors to penetrate deeper. However, if you’re short on time, you can proceed immediately. - Heat Your Pan
Heat a large skillet over medium-high heat. Once hot, add a drizzle of olive oil to prevent sticking. While the pan heats up, pat the chicken breasts dry with paper towels—this ensures they sear properly and develop a golden crust. - Sear the Chicken
Place the chicken breasts in the skillet and cook for about 5-6 minutes on each side, or until they are golden brown and cooked through. If you prefer, you can finish cooking them in the oven at 375°F (190°C) for an additional 5-10 minutes to ensure they’re fully cooked without over-browning. - Add Lemon and Garlic Aromatics
About halfway through cooking, pour the remaining marinade into the skillet around the chicken. Let it simmer for a minute or two, allowing the sauce to reduce slightly and intensify in flavor. This step adds extra moisture and flavor to the dish. - Rest and Serve
Once the chicken is cooked through (internal temperature should reach 165°F or 74°C), remove it from the pan and let it rest for a few minutes. This allows the juices to redistribute, ensuring a juicy bite every time. Garnish with fresh parsley for a pop of color and freshness before serving.
Serving Suggestions
Lemon Garlic Chicken Breast pairs beautifully with a variety of sides, making it incredibly versatile:
- A simple green salad dressed with olive oil and balsamic vinegar
- Roasted vegetables like asparagus, zucchini, or cherry tomatoes
- Quinoa or couscous for a healthy grain option
- Mashed potatoes or roasted sweet potatoes for a heartier meal
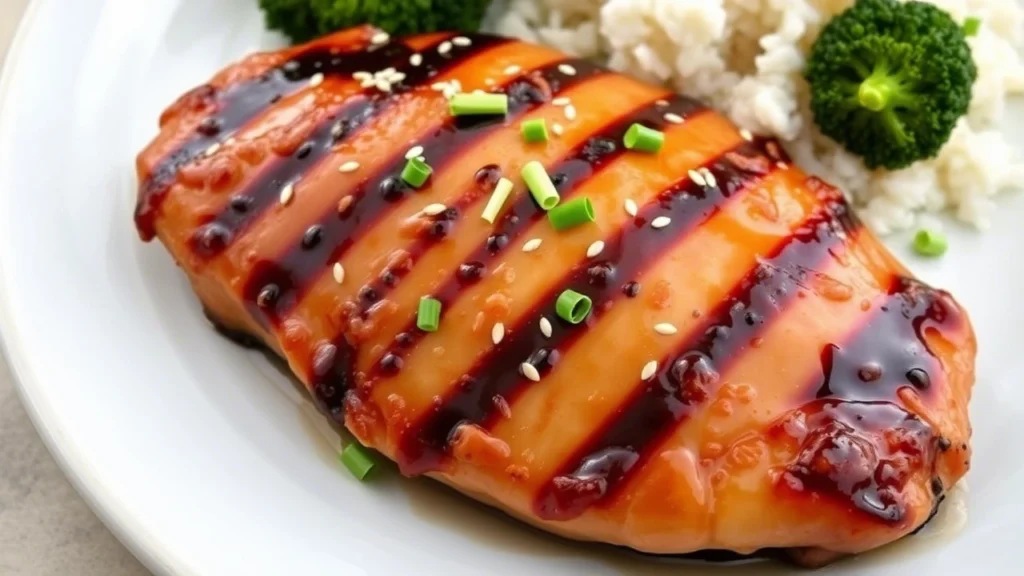
Teriyaki Glazed Chicken Breast
If you’re in the mood for something with a hint of Asian-inspired flavor, Teriyaki Glazed Chicken Breast is a fantastic option. This dish combines the sweetness of honey, the savory umami of soy sauce, and a touch of tang from ginger to create a delicious glaze that coats the chicken perfectly. Best of all, it’s simple to make and can be ready in under 30 minutes, making it perfect for busy weeknights or when you want to impress your family and friends.
Why You’ll Love Teriyaki Glazed Chicken Breast
The teriyaki glaze adds a sticky, glossy finish to the chicken that’s both sweet and savory, creating a perfect balance of flavors. Plus, the marinade doubles as a sauce, so you don’t have to worry about making extra components for your meal. Whether served on its own or paired with rice and veggies, this dish is sure to satisfy everyone at the table.
Ingredients You’ll Need
Here’s what you’ll need to make this mouthwatering Teriyaki Glazed Chicken Breast:
- 4 boneless, skinless chicken breasts (pounded to even thickness)
- 1/4 cup soy sauce
- 2 tablespoons honey (or brown sugar for a deeper flavor)
- 2 cloves garlic, minced
- 1 tablespoon grated fresh ginger
- 1 tablespoon rice vinegar (or apple cider vinegar)
- 1 teaspoon cornstarch mixed with 1 tablespoon water (optional, for thickening the sauce)
- Sesame seeds and green onions for garnish (optional)
Step-by-Step Instructions
- Prepare the Marinade
In a small bowl, whisk together the soy sauce, honey, minced garlic, grated ginger, and rice vinegar. This will serve as both the marinade and the glaze for your chicken. If you have time, marinate the chicken in the fridge for at least 30 minutes to allow the flavors to soak in. However, if you’re short on time, you can proceed without marinating. - Cook the Chicken
Heat a large skillet over medium-high heat and add a drizzle of oil. Once hot, place the chicken breasts in the skillet and cook for about 5-6 minutes on each side, or until they are golden brown and cooked through. For juicier results, avoid flipping the chicken too often—let it sear properly before turning. - Add the Sauce
About halfway through cooking, pour the remaining marinade into the skillet around the chicken. Let it simmer for a few minutes, basting the chicken with the sauce as it cooks. If you’d like a thicker glaze, stir in the cornstarch mixture and let it simmer for another minute until the sauce thickens slightly. - Finish and Serve
Once the chicken is fully cooked (internal temperature should reach 165°F or 74°C), remove it from the pan and let it rest for a few minutes. This allows the juices to redistribute, ensuring a juicy bite every time. Garnish with sesame seeds and chopped green onions for added flavor and presentation.
Serving Suggestions
Teriyaki Glazed Chicken Breast pairs beautifully with a variety of sides, making it incredibly versatile:
- Steamed white or brown rice to soak up the flavorful sauce
- Stir-fried vegetables like broccoli, bell peppers, or snap peas
- Sushi rolls or spring rolls for an extra Asian twist
- Miso soup or a simple salad for a lighter option
Creative Ways to Serve Your Chicken Breast
Pair with Fresh Salads
When it comes to serving chicken breast for dinner, one of the easiest and healthiest options is pairing it with a fresh salad. Not only does this combination create a well-rounded meal, but it also adds color, texture, and extra nutrients to your plate. Whether you’re aiming for a light summer dinner or a quick weeknight meal, a vibrant salad can elevate your chicken breast from simple to spectacular.
Why Salads Are a Perfect Match
Salads are incredibly versatile and can complement almost any flavor profile of chicken breast. From zesty lemon-garlic chicken to savory herb-crusted or sweet teriyaki-glazed varieties, there’s a salad that will pair beautifully with each recipe. Plus, they’re quick to prepare, customizable to your taste preferences, and packed with vitamins and fiber to keep you feeling satisfied.
Simple Salad Ideas to Pair with Chicken Breast
- Mixed Greens Salad
A classic mixed greens salad is always a great choice. Toss together spinach, arugula, romaine lettuce, and other leafy greens. Add some cherry tomatoes, cucumber slices, shredded carrots, and crumbled feta cheese for extra flavor. Drizzle with olive oil and balsamic vinegar or your favorite vinaigrette, then top with sliced chicken breast for a protein-packed meal. - Quinoa Salad
For a heartier option, try a quinoa-based salad. Cooked quinoa pairs wonderfully with roasted vegetables like bell peppers, zucchini, and red onions. Add chickpeas for added protein and toss everything in a lemon-tahini dressing. Top with grilled or baked chicken breast for a nutritious and filling dish. - Caesar Salad
If you’re in the mood for something creamy and indulgent, a Caesar salad is an excellent choice. Use romaine lettuce as the base and add homemade croutons, Parmesan shavings, and a rich Caesar dressing. Grilled chicken breast works especially well here, adding a satisfying crunch and juicy contrast to the crisp greens. - Mediterranean Salad
Bring the flavors of the Mediterranean to your table with a refreshing salad featuring chopped cucumbers, Kalamata olives, cherry tomatoes, red onion, and feta cheese. Dress it with olive oil, red wine vinegar, and dried oregano. Pan-seared or grilled chicken breast pairs perfectly with this bright and tangy salad. - Asian-Inspired Salad
For those who love bold flavors, an Asian-inspired salad is a must-try. Combine shredded Napa cabbage, carrots, snap peas, and toasted sesame seeds. Whisk together a soy-ginger dressing using soy sauce, rice vinegar, honey, and grated ginger. Serve alongside teriyaki-glazed chicken breast for a deliciously balanced meal.
Tips for Building the Best Salad
- Balance textures : Include crunchy ingredients like nuts, seeds, or croutons to contrast with the softness of the chicken and greens.
- Add color : Incorporate colorful veggies like bell peppers, beets, or radishes to make your salad visually appealing.
- Don’t over-dress : Start with a light drizzle of dressing and adjust according to your preference. Too much can overwhelm the flavors of both the salad and the chicken.
Serve with Roasted Vegetables
Roasted vegetables are a simple yet incredibly delicious way to complement your chicken breast for dinner. Not only do they add vibrant colors and textures to your plate, but they also enhance the overall flavor profile of your meal. Best of all, roasting brings out the natural sweetness in vegetables, making them irresistibly tasty even for those who aren’t big veggie fans.
Why Roasted Vegetables Are a Great Match
Roasting is one of the easiest ways to prepare vegetables, and it pairs beautifully with the savory flavors of chicken breast. The caramelized edges and tender interiors of roasted veggies create a perfect contrast to the juicy chicken. Plus, you can cook both the chicken and vegetables in the same oven at the same time, saving you effort and cleanup. Whether you’re serving herb-crusted, lemon-garlic, or teriyaki-glazed chicken, roasted vegetables will elevate your dish effortlessly.
Simple Vegetable Options to Try
- Broccoli and Cauliflower
These cruciferous veggies are classic choices for roasting. Toss them with olive oil, garlic powder, salt, and pepper, then spread them on a baking sheet. Roast at 400°F (200°C) for about 20-25 minutes, stirring halfway through, until they’re golden brown and tender. Their earthy flavor complements any type of chicken breast recipe. - Carrots and Parsnips
For a sweeter option, try roasting carrots and parsnips. Slice them into thin rounds or batons, drizzle with honey or maple syrup, and sprinkle with thyme or rosemary. Roast at 425°F (220°C) for 25-30 minutes until caramelized and soft. This combination works especially well with herb-crusted or lemon-garlic chicken. - Brussels Sprouts
Brussels sprouts become irresistible when roasted. Halve them and toss with olive oil, balsamic vinegar, and crushed red pepper flakes for a touch of heat. Roast at 400°F (200°C) for 20-25 minutes until crispy on the outside and tender inside. They pair wonderfully with teriyaki-glazed chicken or any other Asian-inspired dish. - Zucchini and Bell Peppers
For a lighter option, slice zucchini and bell peppers into strips and roast them together. Drizzle with olive oil, minced garlic, and a squeeze of lemon juice. Roast at 375°F (190°C) for 15-20 minutes until slightly charred and tender. This medley is ideal for grilled or pan-seared chicken breasts. - Sweet Potatoes and Onions
Sweet potatoes add a comforting sweetness that balances the savory notes of chicken. Cut them into cubes along with red onions, toss with olive oil, paprika, and cumin, and roast at 425°F (220°C) for 25-30 minutes. This hearty side dish pairs beautifully with baked or grilled chicken.
Tips for Perfectly Roasted Vegetables
- Use high heat : Roasting at temperatures between 400°F (200°C) and 450°F (230°C) ensures the vegetables develop a crispy exterior while staying tender inside.
- Don’t overcrowd the pan : Leave enough space between the veggies so they roast instead of steaming. This helps achieve that golden-brown caramelization.
- Season generously : Experiment with different herbs and spices like thyme, oregano, chili flakes, or curry powder to match the flavors of your chicken recipe.
- Add aromatics : Throw in minced garlic, shallots, or fresh herbs during the last 10 minutes of roasting for an extra burst of flavor.
Add Flavorful Sauces
While a perfectly cooked chicken breast is delicious on its own, adding a flavorful sauce can take your dinner to the next level. Sauces not only enhance the taste but also add moisture and richness to the dish, making it feel more indulgent and satisfying. Whether you’re in the mood for something creamy, tangy, or spicy, there’s a sauce out there that will pair beautifully with your chicken breast.
Why Sauces Matter
A good sauce can transform an ordinary piece of chicken into an extraordinary meal. It adds depth, complexity, and excitement to your plate, tying together all the flavors in your dish. Plus, sauces are incredibly versatile—you can make them ahead of time, customize them to suit your taste, or even use leftovers for other meals throughout the week.
Simple Sauce Ideas to Elevate Your Chicken Breast
- Chimichurri Sauce
This vibrant Argentinean sauce is made with fresh parsley, cilantro, garlic, red wine vinegar, olive oil, and a pinch of red pepper flakes. Its bright, herby flavor pairs beautifully with grilled or pan-seared chicken breasts. Simply whisk the ingredients together, let it sit for at least 30 minutes to allow the flavors to meld, and drizzle it over your chicken before serving. - Pesto Sauce
Packed with basil, pine nuts, Parmesan cheese, garlic, and olive oil, pesto is a creamy yet zesty option that complements both baked and grilled chicken. You can either buy pre-made pesto or whip up a batch yourself using a food processor. Serve it as a topping or mix it with pasta for a complete meal. - Honey Mustard Sauce
For those who love a sweet and tangy combination, honey mustard sauce is a crowd-pleaser. Mix equal parts Dijon mustard and honey with a splash of apple cider vinegar and a dash of salt. This easy-to-make sauce works wonders with lemon-garlic chicken or roasted chicken breasts. - Teriyaki Sauce
If you’re serving teriyaki-glazed chicken, why not double down on the flavor with a homemade teriyaki sauce? Combine soy sauce, honey, garlic, ginger, and rice vinegar in a small saucepan and simmer until slightly thickened. Brush it onto the chicken during the last few minutes of cooking for an extra layer of sweetness and umami. - Creamy Lemon-Dill Sauce
Light and refreshing, this sauce is perfect for herb-crusted or baked chicken breasts. Whisk together sour cream, lemon juice, chopped fresh dill, minced garlic, and a pinch of salt. The tangy, creamy texture balances the savory flavors of the chicken while adding a pop of freshness.
Tips for Making the Most Out of Your Sauces
- Balance flavors : Ensure your sauce has a mix of salty, sweet, sour, and umami elements to create a well-rounded taste. For example, if your sauce is too acidic, balance it with a bit of honey or sugar.
- Adjust consistency : Thicken your sauce by reducing it on the stove or adding a slurry of cornstarch and water. Conversely, thin it out with a little broth or milk if it’s too thick.
- Garnish generously : Drizzle sauces artistically over your chicken or serve them on the side for dipping. A dollop of chimichurri or a swirl of pesto can instantly elevate the presentation of your dish.
- Experiment freely : Don’t be afraid to tweak recipes to suit your preferences. Swap herbs, adjust spice levels, or try new ingredients to find your signature sauce.
Meal Prep and Storage Tips for Chicken Breast


How to Store Cooked Chicken Breast
Cooking chicken breast for dinner is a great way to save time and effort, especially if you’re planning meals for the week. Proper storage ensures that your cooked chicken stays fresh, safe to eat, and just as delicious when reheated. Whether you’re meal prepping or saving leftovers, here’s how to store your chicken breast correctly so it retains its flavor and texture.
Why Proper Storage Matters
Cooked chicken can spoil quickly if not stored properly, which is why it’s important to follow a few simple guidelines. By storing your chicken correctly, you extend its shelf life, reduce food waste, and ensure it remains safe to eat. Plus, having pre-cooked chicken on hand makes it easy to whip up quick lunches, salads, or dinners throughout the week.
Step-by-Step Guide to Storing Cooked Chicken Breast
- Cool It Down Quickly
After cooking, let the chicken rest for a few minutes to allow the juices to redistribute. Once it’s cool enough to handle, transfer it to an airtight container or sealable plastic bag. Avoid leaving cooked chicken at room temperature for more than two hours, as bacteria can grow rapidly in this “danger zone” (40°F to 140°F). - Use Airtight Containers
To prevent odors from transferring in the fridge and keep the chicken fresh, always store it in an airtight container or wrap it tightly with plastic wrap or aluminum foil. This also helps maintain moisture, preventing the chicken from drying out. - Refrigerate Promptly
Place the cooked chicken in the refrigerator within two hours of cooking. For best results, store it on the bottom shelf to avoid any accidental spills that could contaminate other foods. Properly stored, cooked chicken will last 3–4 days in the fridge. - Freeze for Longer Storage
If you don’t plan to eat the chicken within a few days, freezing is the way to go. Divide the chicken into portion sizes for easy use later, then place each piece in a freezer-safe bag or container. Label the package with the date to keep track of how long it’s been frozen. Frozen chicken can last up to 4 months without losing quality. - Tips for Freezing
- Squeeze out as much air as possible from the freezer bags to prevent freezer burn.
- Consider wrapping the chicken in parchment paper or plastic wrap before placing it in a freezer bag for added protection.
- Flatten the chicken pieces slightly before freezing to make them easier to stack and thaw faster.
How to Tell If Stored Chicken Is Still Good
Before using leftover chicken, give it a quick check:
- Smell : Fresh chicken should have no strong odor. If it smells sour or off, discard it.
- Texture : The chicken should feel firm and moist, not slimy or dry.
- Appearance : Any unusual discoloration or mold growth means it’s time to toss it.
Meal Prep Ideas with Stored Chicken
Having cooked chicken on hand opens up endless possibilities for quick and healthy meals:
- Toss it into salads for lunch.
- Use it in wraps, sandwiches, or grain bowls.
- Add it to soups, stir-fries, or pasta dishes for a protein boost.
Reheating Without Drying Out
One of the biggest challenges with leftover chicken breast is reheating it without turning it into a dry, rubbery mess. Luckily, with a few simple tricks, you can keep your chicken juicy and flavorful no matter how you reheat it. Whether you’re using the microwave, oven, or stovetop, these methods will help you enjoy delicious chicken just like the first time around.
Why Chicken Dries Out When Reheated
Chicken breast has a tendency to lose moisture when reheated because heat can cause the proteins to contract and squeeze out water. This is especially true for lean cuts like boneless, skinless chicken breasts. However, by adding a bit of moisture back into the equation and controlling the heat, you can prevent this from happening and preserve that tender texture.
Best Methods for Reheating Chicken Breast
1. Oven Method – For Even Heating
The oven is one of the best ways to reheat chicken breast while maintaining its juiciness. Here’s how:
- Preheat your oven to 300°F (150°C).
- Place the chicken in an oven-safe dish and cover it loosely with foil. This traps steam and prevents the chicken from drying out.
- Add a splash of liquid such as broth, water, or lemon juice to the bottom of the dish for extra moisture.
- Heat for about 15–20 minutes, or until the chicken is warmed through. Check occasionally to avoid overcooking.
2. Microwave Method – For Quick Results
While microwaving can sometimes make chicken tough, there’s a way to do it right:
- Place the chicken on a microwave-safe plate and cover it with a damp paper towel. The moisture from the towel helps retain the chicken’s natural juices.
- Microwave on medium power (50%) in short intervals (30 seconds to 1 minute), flipping the chicken halfway through.
- Stop reheating once the chicken reaches your desired temperature—usually around 165°F (74°C). Overheating can lead to dryness.
3. Stovetop Method – For Added Flavor
Reheating chicken on the stovetop not only keeps it moist but also allows you to add extra flavor:
- Heat a non-stick skillet over low to medium heat. Add a small amount of oil, butter, or sauce to the pan.
- Place the chicken in the skillet and cover it with a lid to trap steam. Cook gently, flipping occasionally, until heated through.
- If needed, pour a little broth or water into the pan to create more moisture.
4. Air Fryer Method – For Crispy Results
If you want to give your chicken a crispy exterior, try the air fryer:
- Preheat the air fryer to 350°F (175°C).
- Spray the basket lightly with cooking spray to prevent sticking.
- Place the chicken in the air fryer basket and cook for 5–7 minutes, shaking halfway through. For added moisture, brush the chicken with a bit of olive oil or marinade before reheating.
Tips for Perfectly Reheated Chicken
- Add Moisture : Always include some form of liquid—whether it’s broth, water, or sauce—when reheating chicken. This helps replace any moisture lost during storage.
- Low and Slow : Avoid high heat, which can quickly dry out the chicken. Use gentle heat and take your time to warm it evenly.
- Cover It Up : Covering the chicken while reheating traps steam, keeping the meat soft and juicy. Use foil, a lid, or a damp paper towel depending on the method.
- Check Often : Keep an eye on the chicken as it reheats to ensure it doesn’t overcook. Overheating is the main culprit behind dry, tough chicken.
Bonus Idea: Transform Leftover Chicken
Instead of simply reheating plain chicken, consider transforming it into something new:
- Chop it up and toss it into a stir-fry or pasta dish.
- Shred it and use it for tacos, sandwiches, or salads.
- Dice it and mix it into soups or casseroles for added protein.
Conclusion
Cooking chicken breast for dinner doesn’t have to be boring or complicated. With the right techniques, seasonings, and serving ideas, you can turn this versatile protein into a delicious meal that everyone will love. Whether you’re grilling, baking, or pan-searing, there are countless ways to make chicken breast juicy, flavorful, and satisfying.
Throughout this post, we’ve explored several key aspects of cooking chicken breast: from choosing the right cut and mastering cooking techniques to sharing mouthwatering recipes like Herb-Crusted Chicken Breast , Lemon Garlic Chicken Breast , and Teriyaki Glazed Chicken Breast . We’ve also discussed how to elevate your meals by pairing chicken with fresh salads, roasted vegetables, and flavorful sauces. Plus, we provided practical tips on storing and reheating cooked chicken so you can enjoy it all week long.
The beauty of chicken breast lies in its flexibility—it can adapt to almost any flavor profile or cooking method, making it perfect for everything from quick weeknight dinners to special occasions. By experimenting with different recipes and techniques, you’ll discover new ways to keep things exciting in the kitchen.